
Olya Kajuchi Bhaji Recipe | ओल्या काजूची भाजी रेसिपी
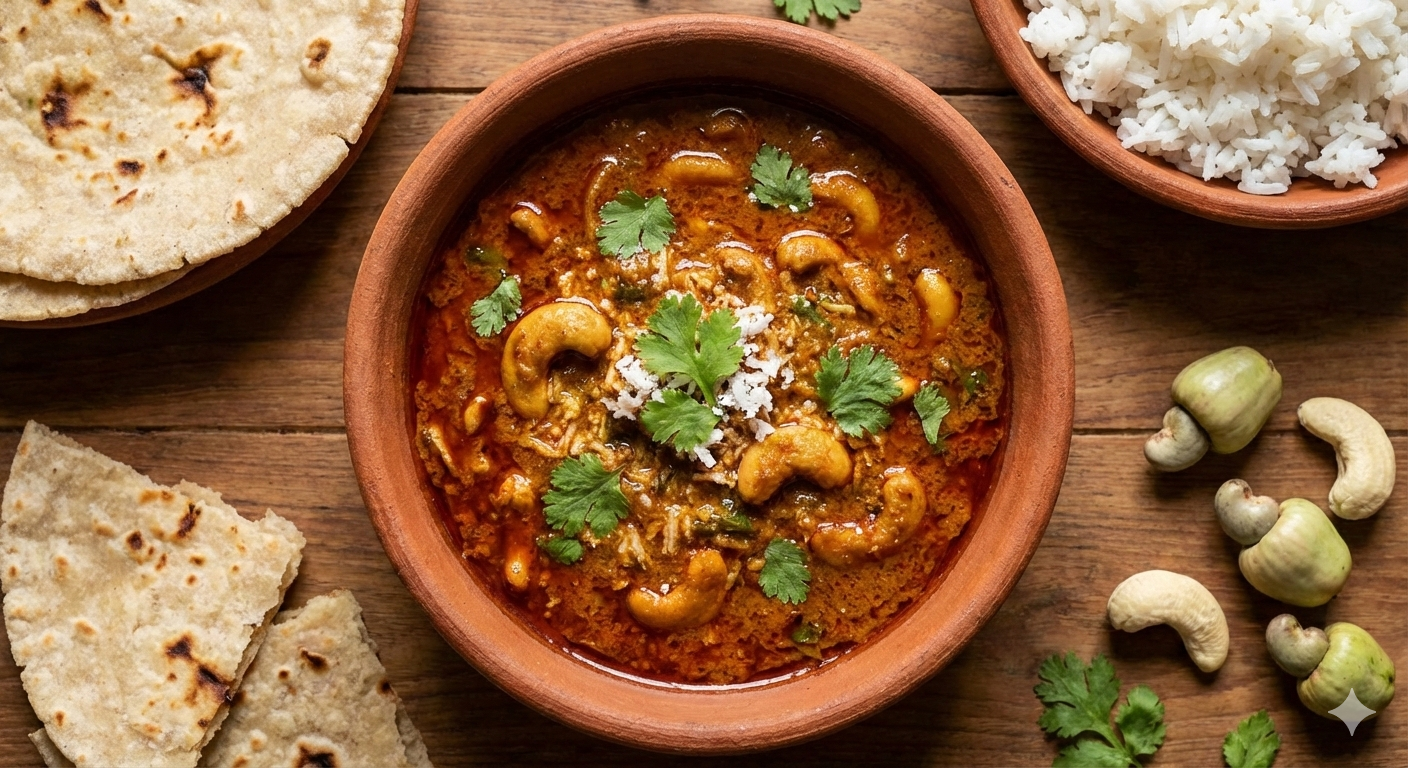
If there is one dish that can make a Konkani person’s heart skip a beat, it’s Olya Kajuchi Bhaji. These tender, milky cashews are only available for a short window during the summer, making them a prized delicacy. Yes, peeling them is a test of patience (and might leave your fingers a bit stained!), but one bite of that creamy, spicy Malvani gravy, and you’ll know it’s worth every second.Craving another grand feast? While this cashew curry is a vegetarian gem, if you’re in the mood for a royal non-veg treat, don't forget to check out my latest [Chicken Biryani Recipe] – it’s just as aromatic and flavorful!कोकणच्या लाल मातीतला अस्सल मेवा म्हणजे 'ओले काजू'. उन्हाळ्याची चाहूल लागली की वेध लागतात ते ओल्या काजूच्या रसरशीत भाजीचे. ही भाजी फक्त चवीलाच भारी नसते, तर ती बनवण्याची आणि सहकुटुंब काजू सोलण्याची मजा काही वेगळीच असते. आज आपण पाहणार आहोत अगदी हॉटेलसारखी पण घरगुती चवीची ओल्या काजूची भाजी.आणि हो, जर तुम्हाला ओल्या काजूच्या भाजीसोबतच काहीतरी झणझणीत आणि चमचमीत मांसाहारी बेत करायचा असेल, तर माझी ही लेटेस्ट [चिकन बिर्याणी रेसिपी] नक्की ट्राय करा.
Ingredients
Method
- Process (English)
- Step 1:
- Soak the tender cashews in warm water for 15 minutes. Carefully peel off the outer skin and set them aside.
- Step 2:
- In a small pan, roast a little sliced onion and the fresh coconut until golden brown. Grind this into a smooth paste (Vatan) with a little water.
- Step 3:
- Heat oil in a kadhai. Add the chopped onions and sauté until they turn soft and translucent.
- Step 4:
- Add ginger-garlic paste and sauté until the raw smell disappears. Now, add turmeric and Malvani masala; mix well on low heat.
- Step 5:
- Add the cleaned cashews and toss them with the spices. Add half a cup of water, cover with a lid, and let the cashews cook for 8–10 minutes.
- Step 6:
- Once the cashews are tender, add the prepared coconut-onion paste and salt. Adjust the gravy consistency with a little more water if needed.
- Step 7:
- Simmer for 4–5 minutes until the oil starts to float on top. Sprinkle garam masala and garnish with fresh coriander.
- Serve hot with Amboli, Bhakri, or steamed rice.
- कृती
- स्टेप १:
- ओले काजू १५ मिनिटे कोमट पाण्यात भिजत ठेवा. त्यानंतर त्याची टरफले काढून काजू स्वच्छ करून घ्या.
- स्टेप २:
- थोड्या तेलावर खोबरं आणि कांदा तांबूस होईपर्यंत परता. थंड झाल्यावर पाणी घालून त्याचे गुळगुळीत वाटण तयार करा.
- स्टेप ३:
- कढईत तेल गरम करून बारीक चिरलेला कांदा मऊ होईपर्यंत परतून घ्या.
- स्टेप ४:
- त्यात आले-लसूण पेस्ट घालून परता. आता हळद आणि मालवणी मसाला घालून मंद आचेवर नीट मिक्स करा.
- स्टेप ५:
- स्वच्छ केलेले काजू घालून मसाल्यात घोळवून घ्या. अर्धा कप पाणी घालून झाकण ठेवा आणि काजू ८-१० मिनिटे शिजवून घ्या.
- स्टेप ६:
- काजू थोडे शिजले की त्यात तयार केलेले खोबऱ्याचे वाटण आणि चवीनुसार मीठ टाका. आवश्यकतेनुसार पाणी घालून ग्रेव्हीची सुसंगतता तपासा.
- स्टेप ७:
- भाजीला ५ मिनिटे छान उकळी येऊ द्या. शेवटी गरम मसाला आणि कोथिंबीर घालून गरमागरम आंबोळी, भाकरी किंवा भातासोबत सर्व्ह करा. २:
- थोड्या तेलावर खोबरं आणि कांदा तांबूस होईपर्यंत परता. थंड झाल्यावर पाणी घालून त्याचे गुळगुळीत वाटण तयार करा.
Notes
- Cleaning Hack: Apply a little oil to your hands before peeling the cashews to avoid the sticky sap staining your skin.
टिप: ओले काजू सोलताना हाताला थोडे तेल लावा, म्हणजे काजूचा चीक हाताला चिकटणार नाही आणि हात काळे होणार नाहीत.
Join our Facebook and Instagram channels dedicated to delicious and authentic recipes from Chatakdar. Discover easy cooking tips, step-by-step recipes, and tasty food ideas that make everyday meals special. Let’s cook, share, and enjoy great flavors together!
चटकदार रेसिपीजच्या स्वादिष्ट आणि पारंपरिक पदार्थांसाठी आमच्या समर्पित Facebook आणि Instagram चॅनेलमध्ये सामील व्हा. सोप्या कुकिंग टिप्स, स्टेप-बाय-स्टेप रेसिपीज आणि रोजच्या जेवणाला खास बनवणाऱ्या चविष्ट कल्पना मिळवा. “चला एकत्र चटकदार रेसिपीज शिकूया!”
Facebook Channel || Instagram Channel